Common Drywall Repair Mistakes Homeowners Make
Home improvement projects often excite homeowners, especially when they involve doing it yourself. Among various DIY projects, drywall repair stands out as a common task that many homeowners choose to tackle on their own. Unfortunately, this seemingly simple task can lead to a series of common mistakes that mar the outcome. Here's a closer look at these pitfalls and how you can steer clear of them to achieve professional-quality drywall repairs.
Overlooking Proper Surface Preparation
One fundamental error homeowners make is neglecting thorough surface preparation. Proper preparation is crucial for any successful drywall repair project. This involves cleaning the surface, removing debris, and ensuring the area is completely dry. Failing to clean the surface results in poor adhesion of repair materials, leading to unsightly bumps and an uneven finish.
Using the Wrong Type of Joint Compound
All joint compounds are not created equal. Homeowners often make the mistake of randomly selecting joint compounds without considering their specific uses. All-purpose joint compounds are versatile but might not always be the best choice for all repairs. Lightweight compounds are easier to sand, while setting-type compounds are more resistant to water damage. Selecting the wrong type can lead to excessive sanding and an uneven repair surface.
Skipping the Primer
Some homeowners believe they can save time and money by skipping the primer before painting. This is a costly mistake. Primer provides a uniform surface which allows the paint to adhere properly. Without primer, paint can appear blotchy and uneven, highlighting the repairs and diminishing the overall look of the wall. Applying a quality primer ensures a smooth and even finish.
Improper Mixing of Joint Compound
Another mistake is improper mixing of the joint compound. Too thick and it becomes difficult to apply smoothly; too thin and it won't adhere properly. Always follow manufacturer instructions for mixing joint compounds. Consistency is key for a seamless repair, and making sure the compound is mixed properly will save time during application and reduce the need for extra sanding.
Neglecting to Use Drywall Tape
When it comes to repairing larger cracks or holes, using drywall tape is essential. Overlooking this step can cause cracks to reappear after completing the repair, ruining the wall's appearance. Drywall tape reinforces joints and seams, preventing future cracking and ensuring long-term durability. Be sure to apply the tape correctly and cover it with joint compound for a strong bond.
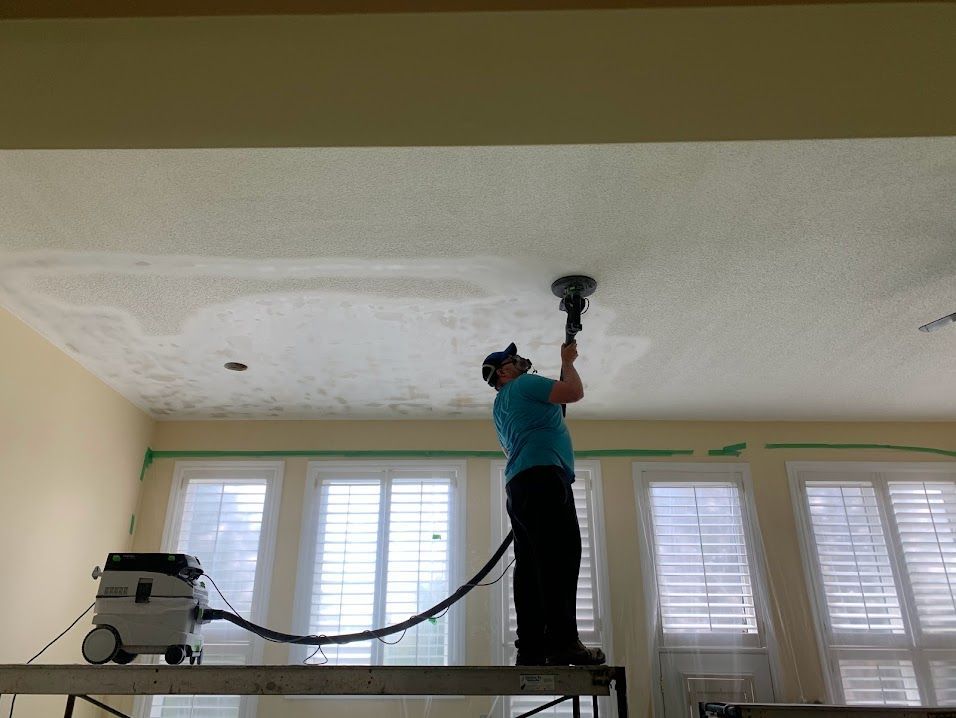
Rushing the Sanding Process
Patience is a virtue, especially in drywall repair Many homeowners rush the sanding process, leading to uneven surfaces and visible seams. Sanding should be done methodically, using a fine-grit sandpaper to achieve a smooth surface. Between sanding passes, inspect the area under bright light to ensure a flawless finish. Taking your time during sanding will reward you with a perfectly smooth wall.
Mismatched Texture and Paint
Once the repair is complete, ensuring that the texture and paint match the existing wall is crucial for a seamless appearance. Too often, homeowners underestimate the challenge of achieving a uniform look. Before applying paint to the entire wall, test it on a small, inconspicuous area to ensure a color match. Additionally, if your walls have a specific texture, consider using matching texturing techniques or tools to blend in the repaired area.
Tips for Flawless Drywall Repair
To achieve professional-grade results, consider using high-quality materials and tools. Investing in the right joint compound, tape, and sanding equipment will make a significant difference in the outcome. Additionally, following each step with precision and care will enhance the final look of your repair work.
When to Call in the Professionals
While minor repairs might be manageable, more extensive damage or a lack of DIY experience might warrant calling in the experts. Professional drywall contractors like Drywallers.ca possess the skills and tools necessary to handle any repair job with accuracy and expertise. They can ensure your walls look as good as new without the hassle of trial and error.
Smooth Walls Start Here
Are you facing drywall challenges at home? Avoid falling into the trap of common mistakes and ensure a perfect finish every time. Whether you're a DIY enthusiast or need professional help for flawless walls, we're here to assist you. Our experienced team at Drywallers.ca is ready to help you achieve the seamless repair you've envisioned.
Transform Your Space Today
There's no need to settle for less than perfect walls. Whether you need a minor patch-up or a comprehensive repair, let our team guide you through the process with precision and expertise. Discover how our exceptional service and meticulous attention to detail can transform your space. Get in touch with Drywallers.ca today to discuss your drywall needs and see how we can help bring your vision to life.
Share This Blog